

We prepared some best practices for you when you start using an online whiteboard for your meetings, workshops, training, and online lessons.
Our tips help your next online whiteboard session a big success!
- Take Care about the Zoom Level
- Structure your Board
- Create a Beautiful Canvas
- Speed-Up Canvas Creation
- Create an Onboarding Experience for New Users
Take Care about the Zoom Level
One challenge is that an online whiteboard has no borders where the whiteboard ends. The canvas you can work on is infinite, and you can zoom in and out.
When you zoom out, it is like when you walk away from your real whiteboard; elements on the board are getting smaller. Adding a new sticky note being far away from the whiteboard does not work. You can add elements when zoomed out on an online whiteboard, but they appear to be very small.
You need to define for yourself what zoom level you want to work on. We recommend a zoom level from 70 -100%.
Please be aware that you can enlarge single elements on the canvas. We have seen many people working on a low zoom level, and when they add new sticky notes, they enlarged them.
When you work like this, you will end up with a board where everything has different sizes.
When you prepare a board for your next session, make sure you create content at your selected zoom level. With that, you will make it much easier for other people to see your content and add their own.
Structure your Board
For a session with an online whiteboard, you must prepare a well-structured canvas. Like you do when writing an agenda for a regular meeting.
A well-structured canvas helps you and the people joining your board to find the right content at the right time. To create a well-structured canvas, consider the following best practices.
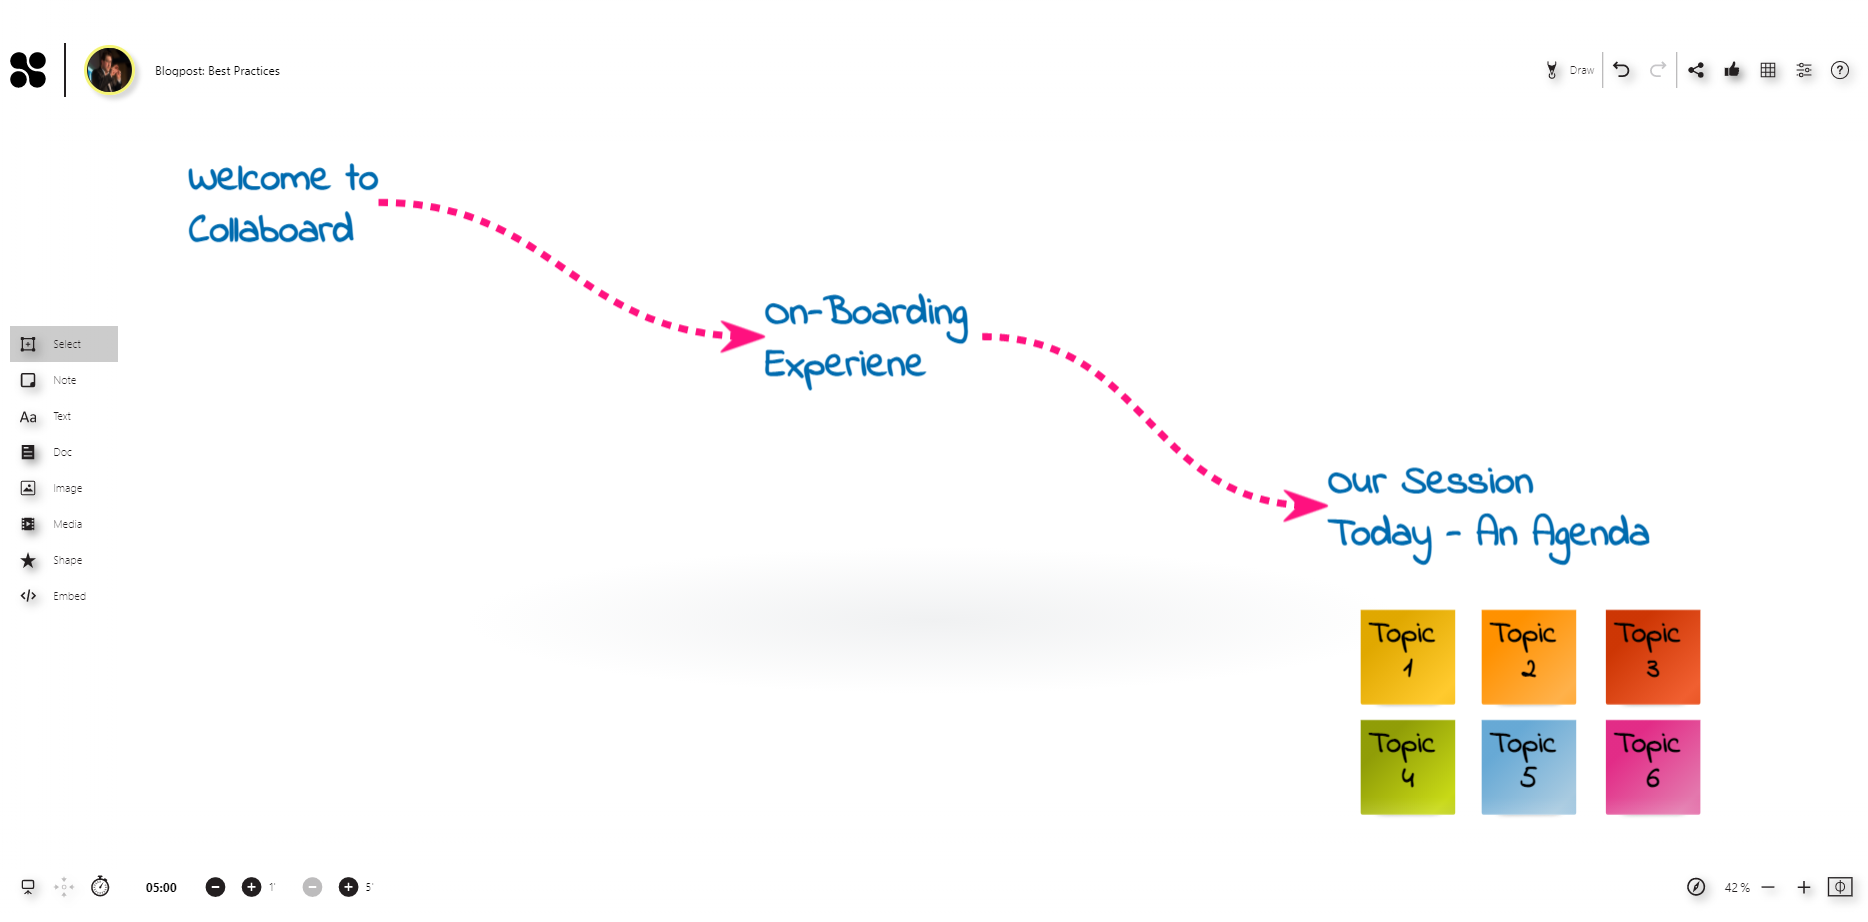
Create a flow on your board using connectors. We usually place the single agenda points as text elements on the board and link them together to visualize a clear flow for the session.
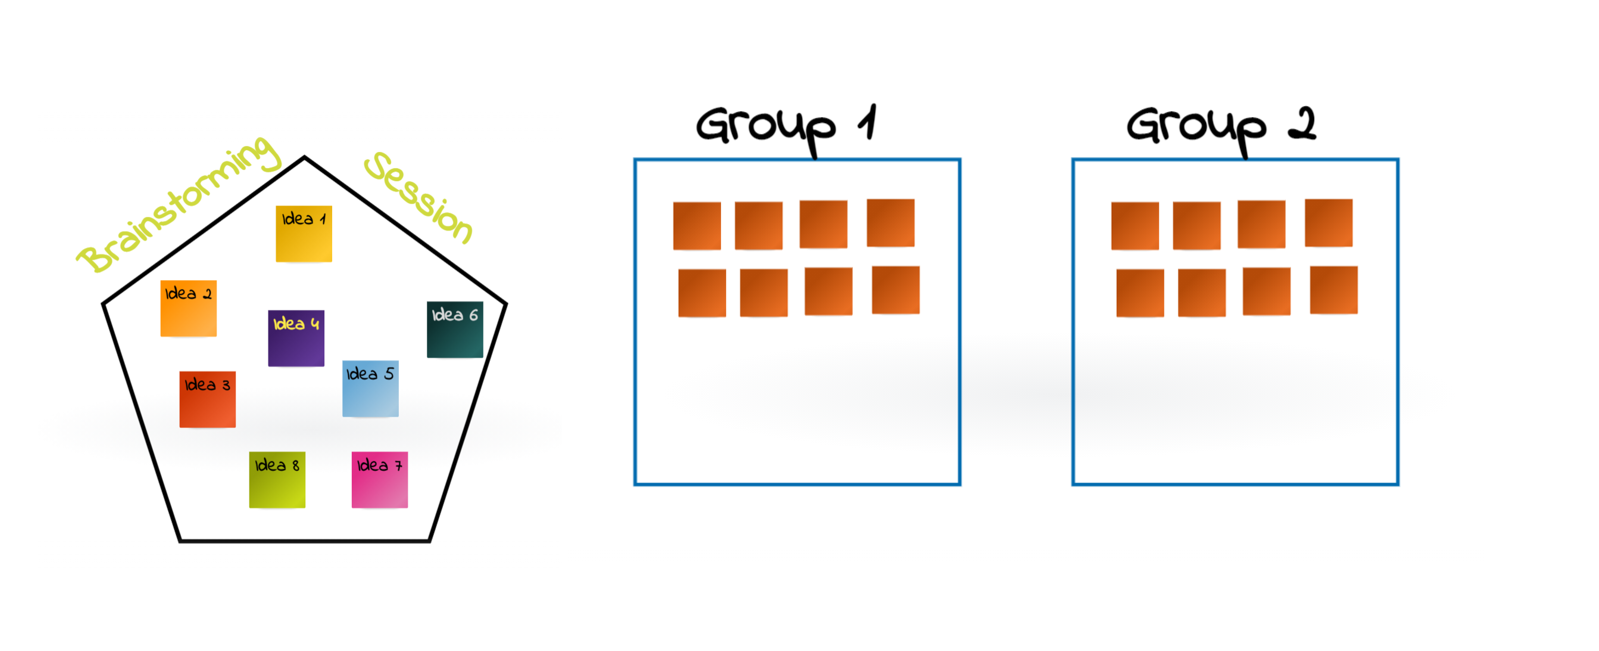
Visually define areas on the board for specific activities, like a brainstorming session or some tasks. A simple way to visualize an area on the board is using a shape. Add a shape that fits your purpose, increase the size, the border, and add a fill-color if you like it colorful.
Use images and stick them to the background of the canvas. We often use a world map during our onboarding session with new users, put it to the board's background, and lock it (locking is essential, so no-one is accidentally moving the object). In a second step, people add pictures of themselves to the map to visualize their origin.
In Collaboard, you can use the Quick Link feature to create a structure on your canvas. You can define a quick link for a selected group of elements and add a name to the link. All the people joining your board can access the quick links and jump directly to the selected element.
Create a Beautiful Canvas
Independent if you are using the online whiteboard just by yourself to present content while sharing the screen or if you are preparing a board for a collaborative session, the way your board looks is essential.
Therefore spend some time creating a good-looking board and leverage the power of visualizations on the whiteboard.
The following tips can help you to improve the way your board looks like:
Play with different fonts and colors: One way to create a nice looking board is to combine the right colors. Try to be consistent when you add sticky notes, texts, shapes, etc., and stick to the colors that fit together. (The colors used in Collaboard match perfectly).
When you add text, be consistent with the font type you choose and use a particular font type when needed.
Pro-Tip: Choose a specific background color for your board or work with the dark-mode in Collaboard.
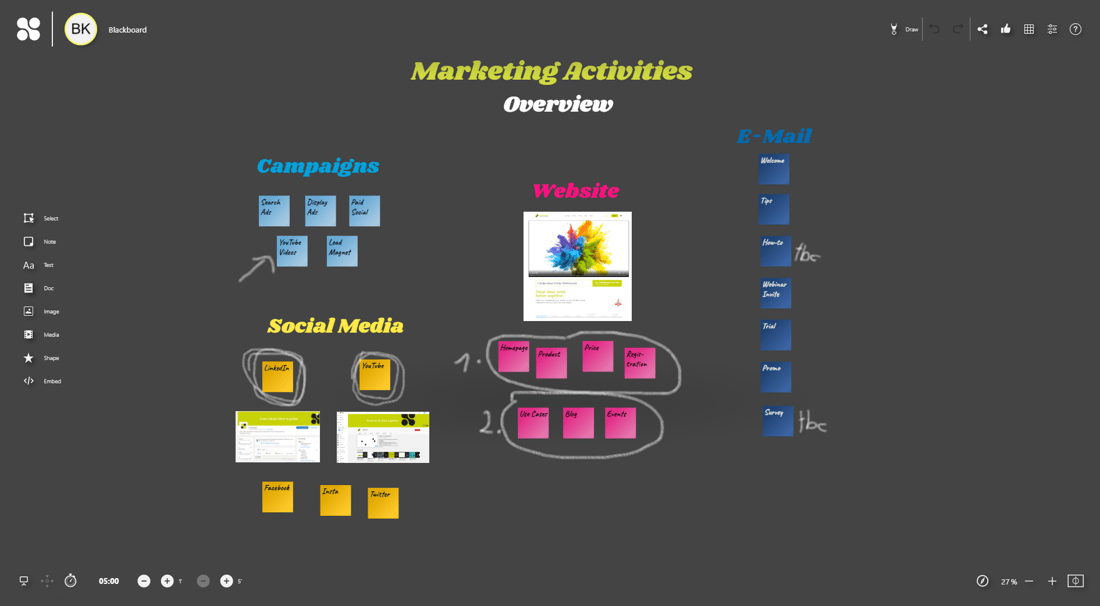
Visualize your statements with images: An image tells more than a thousand words is true as well on online whiteboards. Use pictures to visualize your statements and to tell stories on your board.
When you prepare a board for a specific customer, upload his logo and personalize the board.
Add your personal note by sketching and drawing: The most powerful way to visualize your ideas on the whiteboard is by taking a pen and start to draw and sketch yourself. On an online whiteboard, you can add the same visualizations as on a real-whiteboard.
And the best thing, if you draw it once, you can always copy and re-use it.
Pro-Tip: If you think you can't draw, reconsider your thinking. I learned to visualize using the great books from Bikablo.
Don't forget: Take care about the zoom level!
Speed-Up Canvas Creation
Copy & paste: This is the most crucial feature to speed up creating a whiteboard canvas for your next remote session. Do things once and with high quality. Never do it twice ;)
There are different ways to use the copy feature.
- You can clone entire boards and re-use them, or you can copy & paste content from one board to the other.
- Just open both boards in one browser tab, select the content you want to copy, and past it to the other board.
Need 100 blue sticky notes? In this case, a table is your friend. You can copy & paste entire tables from Excel directly to the board and create sticky notes automatically.
In Collaboard, you have the default settings that help you speed up creating content on the canvas. Use the default settings to define your board sticky note colors, font-types, connection-styles, and much more. To learn more about default settings, please have a look here: How to use default settings in Collaboard
Create an Onboarding Experience for New Users
When you have people using an online whiteboard for the first time in your session, make sure you plan some time for onboarding.
If you are hosting an online workshop, your attendees do not need to understand all the whiteboard features. Focus on your onboarding experience on what is relevant for the tasks you prepared.
See here some tips on how to create a successful onboard experience.
- Take 2 minutes to explain why you are using an online whiteboard and outline the goals you want to achieve with this technology.
- Start with a simple exercise that is not related to your workshop at all. For example, ask people to add a photo of themselves or write their name on a sticky note. Allow people to make mistakes and experiment a little. As it is not related to the workshop, it does not matter if they mess something up.
- Create small exercises that help the people to get to know exactly the features needed in the session you prepared for them.
If you consider these tips, then your next session with an online whiteboard will be successful. Your attendees will be excited and thankful that you introduced them in the right way to this new technology.